Here we are with the latest features in Microsoft Dynamics 365 SCM. Our experts have had a look themselves to see how they fare. Scroll on to learn what the folks at Microsoft have introduced to boost your user experience.

Add the new mobile device menu item to a menu
Configure detours in mobile device steps
To complete the setup, we must now use the detour configuration on the Mobile device steps page to add the new mobile device menu item to the existing purchase order identification step in the Purchase receive flow.
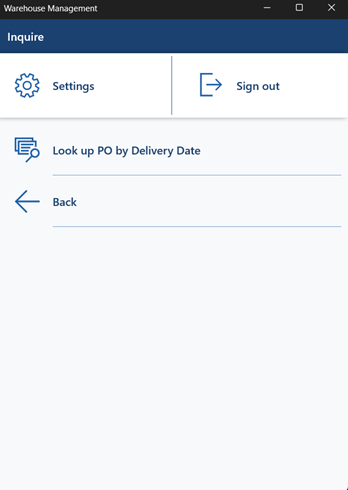
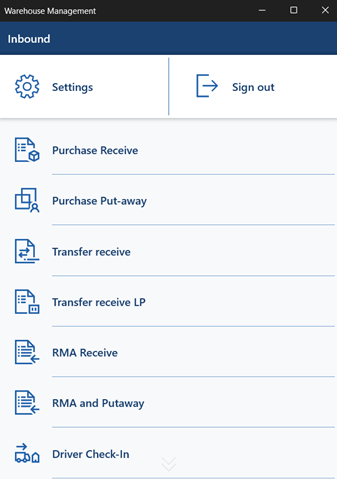
We can use this inquiry to look up the purchase orders by delivery date and it is also accessible from Inbound > Purchase Receive menu as we configured the detours in the mobile device step.
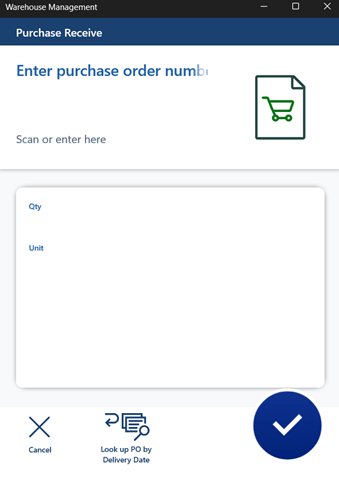
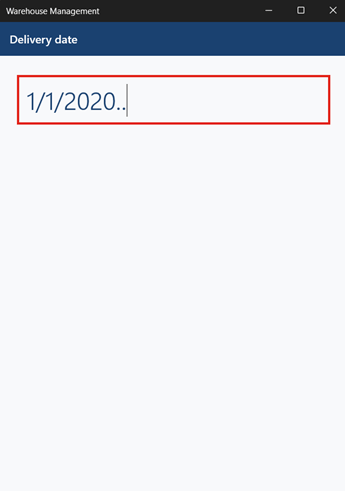
We can try to look up purchase orders by delivery date (in this example: 1/1/2020.. for delivery dates after 1 January 2020) and select a purchase order.
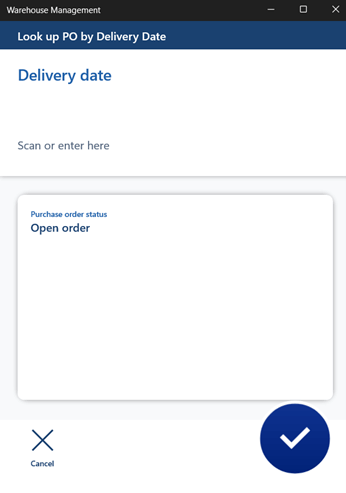
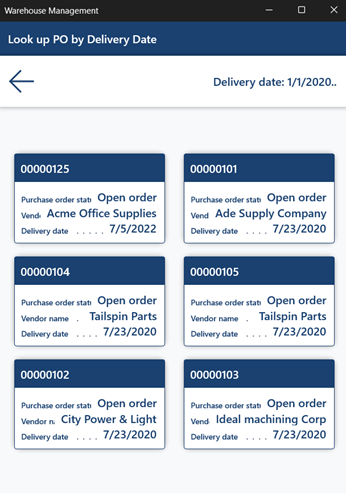
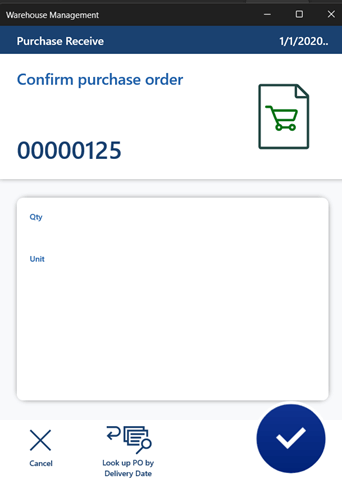
We notice that we can send back a purchase order number by selecting one of the cards in the list and click on the confirm icon.
Check the offer for the support and development of MS Dynamics 365 FSCM here.
Dynamics 365 One Version SCM Feature 1 – Look up relevant data within the warehouse mobile app
The details
The new feature is released to enable the warehouse workers to search for a record based on the configured criteria within the warehouse mobile app and select related records from a list rather than entering data manually. This feature will improve the speed and accuracy of capturing data through the Warehouse Management mobile app and allow warehouse users to run the inquiries when there is insufficient information available or a bar code does not exist. In these cases, workers must use extra time to manually key in the data, and this can result in data-entry errors, reduced efficiency, and a lower service level. Using a flexible data inquiry process, workers can now look up the required information while working through their standard embedded Warehouse Management mobile app flows.Business Value
The bar code scanning capability of the Warehouse Management mobile app provides an easy and accurate way to capture data. But sometimes, bar codes may be damaged and unreadable, or the required information might not exist as a bar code. Filtering options ensure that only the most relevant data is listed, thereby making manual selection faster and more accurate.Required configuration:
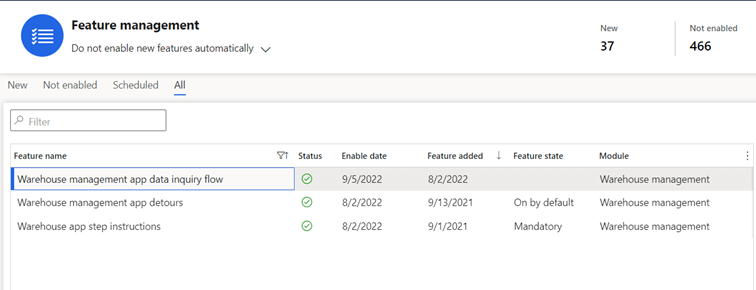
Before you can use the functionality that is described in here, you must complete the following procedure to turn on the required features.- Activate the Warehouse management app data inquiry flow feature from Feature management.
- Make sure the prerequisite features below are also enabled from Feature management though these are default as of version 10.0.29, the Warehouse app step instructions is mandatory and it cannot be turned off:
- Warehouse app step instructions
- Warehouse management app detours

Example Scenario
In this example we are creating a lookup for retrieving the purchase order number and reviewing other related information while performing a purchase receipt from the warehouse management mobile app. It is a useful feature to utilize it in the order receiving flow, where a purchase order number is required to match the arriving inventory. We will configure the menu items to provide a card list view that shows relevant purchase order numbers, making it possible for workers to continue the receiving flow using a quick point-to-select approach.Creating Mobile device menu items – Look up PO by Delivery date
- Go to Warehouse management > Setup > Mobile device > Mobile device menu items.
- In the Action Pane, select New to add a mobile device menu item and provide the values as per the screenshot. We are querying the purchase order number from the purchase order table (PurchTable).
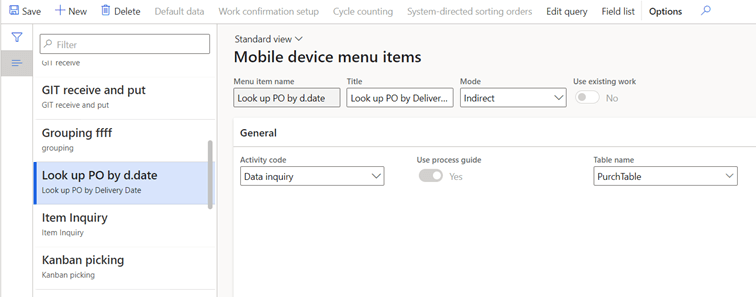
- In the Action Pane, select Edit query to define a query that is based on the selected base table (PurchTable).

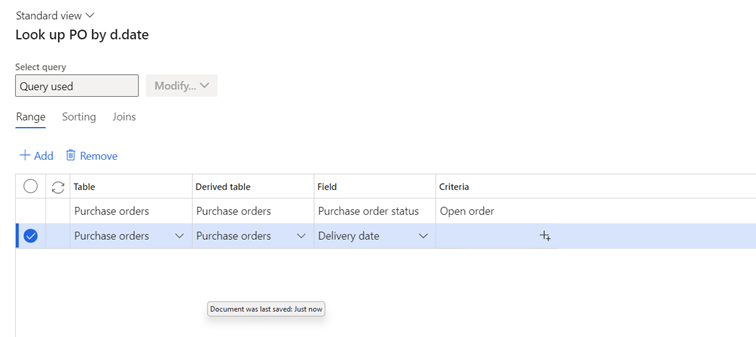
- In the Query editor, in the Range tab, add the following lines to the grid (Purchase order status = Open order, Delivery date without any criteria) and select OK.
- In addition to defining the query, we must select which fields will be shown on the cards in the Inquiry list page. Therefore, in the Action Pane, select Field list.

- On the Field list page, set the following values as per the screenshot and then Save. Please note that we can set up to 8 display fields from the source table as per our requirement.

Add the new mobile device menu item to a menu
- Go to Warehouse management > Setup > Mobile device > Mobile device menu.
- In the Action Pane, select New.
- Set the following values on the header of the new record.
- In the AVAILABLE MENUS AND MENU ITEMS list, select the first of the mobile device menu items that you just created. Then select the right arrow button to move that item into the MENU STRUCTURE list.
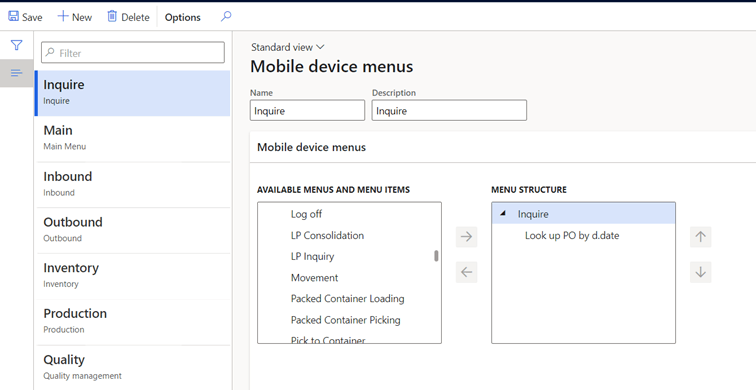
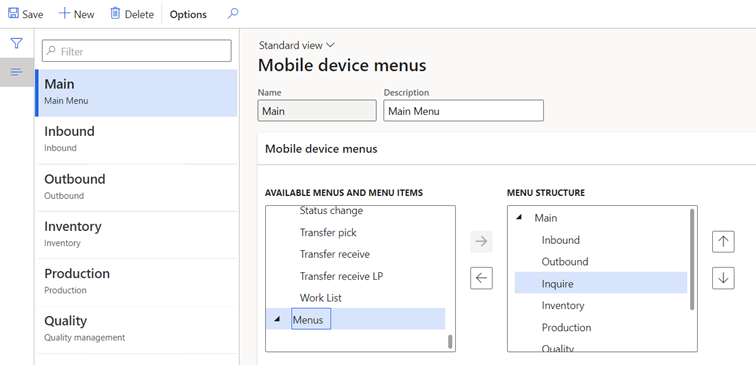
- Inthe AVAILABLE MENUS AND MENU ITEMS list, scroll down to the Menus section, and select your new Inquire menu. Then select the right arrow button to move that item into the MENU STRUCTURE list.
Add the new mobile device menu item
Configure detours in mobile device steps
To complete the setup, we must now use the detour configuration on the Mobile device steps page to add the new mobile device menu item to the existing purchase order identification step in the Purchase receive flow.
- Go to Warehouse management > Setup > Mobile device > Mobile device steps.
- In the Filter field, enter PONum. Then select Step ID: "PONum" in the drop-down list.
- While the record that is found is selected in the grid, select Add step configuration in the Action Pane. In the drop-down dialog box that appears, set the Menu item field to Purchase Receive. Then select OK to close the dialog box.
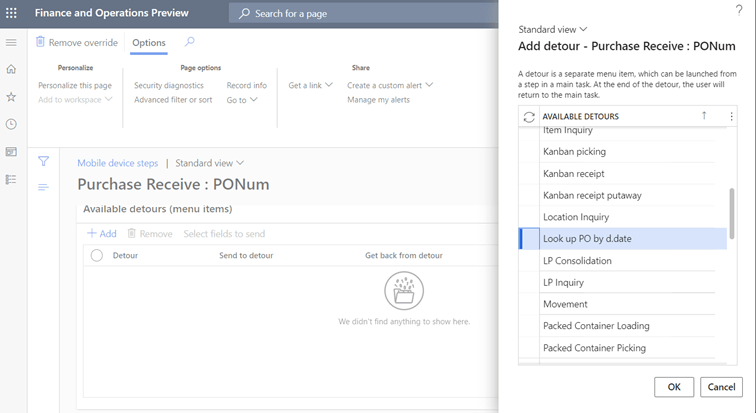
- On the details page for the new step configuration (Purchase Receive : PONum), in AVAILABLE DETOURS (menu items) FastTab, select Add on the toolbar.
- In the Add detour dialog box, find and select the Look up POs by d.date menu item that you previously created and select OK.
- Select the new detour, and then select Select fields to send to the toolbar.

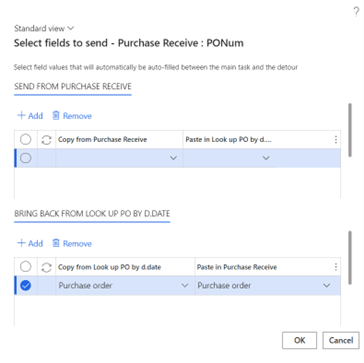
- In the Select fields to send dialog box, do not add anything to the SEND FROM PURCHASE RECEIVE section, because you do not want to pass any values to the detour menu item. However, in the BRING BACK FROM LOOK UP POS BY D.DATE section, set the following value for the empty row that has already been added there: Copy from Look up POs by d.date: Purchase order, Paste in Purchase Receive: Purchase order, and then select OK.

Transaction
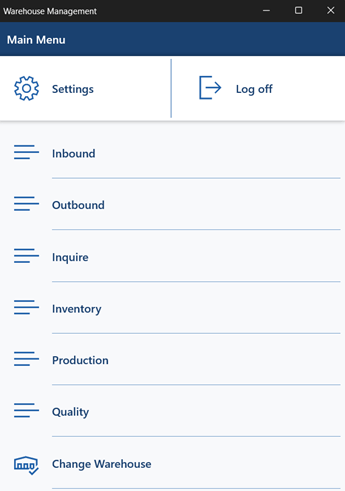
Once the configurations are performed, we can try a purchase receipt from the mobile device. However, before we try the purchase receipt let us check the mobile device menu for the newly added menu items (Inquire > Lookup PO by Delivery Date).

We can use this inquiry to look up the purchase orders by delivery date and it is also accessible from Inbound > Purchase Receive menu as we configured the detours in the mobile device step.


We can try to look up purchase orders by delivery date (in this example: 1/1/2020.. for delivery dates after 1 January 2020) and select a purchase order.


We notice that we can send back a purchase order number by selecting one of the cards in the list and click on the confirm icon.


Result
We have configured a look up to retrieve the purchase order number and relevant information while performing a purchase receipt transaction from a mobile device. The new feature can be utilized to configure data inquiry based on custom criteria and makes it possible to select the desired record without manual entry in the mobile device.Check the offer for the support and development of MS Dynamics 365 FSCM here.


